Hello!
April flew by as quickly as it came for me, I can’t believe
we are sitting in May already!
My crafty challenge for April has kind of grown arms a bit
as I’ve found too many things I want to do, so this craft challenge is a
special 2 month one and will last until the end of this month. So what is it???
My latest craft is...........Crafts and DIY for your home........ok so not
exactly a new craft or particularly refined but this is what is exciting about
this one!
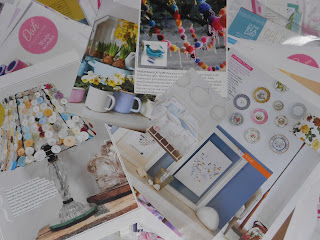
Does anyone else buy crafty or homes magazines see loads of
things they like and then cast aside the magazine into the dark depths of the
magazine rack to gather dust? Or like me do you pile up your magazines, then
every so often go through and cut out/pull out the stuff you are interested in,
create another pile and then leave that. Then after sometime find a use for the
image you have kept or decide to do the project you kept? Well that is most
definitely me, I have various piles for different crafts with good intentions to
make “at some point”.
The idea for this month came when I decided I wanted to
revamp a chest of drawers we got when we moved into our house 2 years ago. May
I just mention despite purposely buying plain unpainted furniture with the view
to paint, it has still taken this long to happen! But I didn’t just want to
paint my furniture I wanted to stick wallpaper on it and paint it. I’d seen
this done in various magazines and thought it looked really effective. Two years certainly gives you plenty of time
to plan and I had already managed to accumulate the chosen Laura Ashley wallpaper (reduced bin!) and handles of my choice, it was now just time to get the
project underway.
In true Camilla fashion this project is still very much
underway but here is how I have got on so far.
How to Wallpaper Your Chest of Drawers
1. Starting with a chest of drawers I gave them a quick
clean with a damp cloth to wash off any dust or dirt. I decided to turn the
wallpaper horizontally so that there was no joining line down my drawers, I
quite liked the way this particular paper looks horizontally. I started out by
measuring the width and length of the drawers and roughly cutting the paper
down to size. I was generous and left excess paper, it is better to do this
than be short, all you need is a sharp craft knife to trim it to size. With my
wallpaper the width of the paper would cover 3 rows of drawers so I cut all my
bits out and then blu tacked them on the drawers to see what it looked like. It
is also easier to trim the paper down to size when it is on the drawers as you
can use the edge of the drawer as a guide to run your craft knife along.
2. Once happy with the paper blu-tacked on and trimmed I
took it off and covered the back of the paper evenly in pva glue. You need to
work fairly quickly as the glue won’t take long to dry. Carefully place the
wallpaper onto the chosen drawers and smooth out any air bubbles. If your paper
is slightly too big just use your craft knife to trim to size, et voila!
3. When it comes to
placing on the next set of paper on your drawers remember to look at your paper
carefully if you want to continue the pattern on. Trim to size and repeat the
steps above. You will then end up with something like this.........
4. Lastly you need to coat your wallpaper with varnish to
seal it in and then decide on your handles! I found these beauties in the
sale section in a local gift shop for 99p each. Total cost for the handles was £11.88, bargain considering some handles retail at £2.50 each or more! To
fix the handles you will need to make a hole in the front of the drawer where
the screw will go through. Use the existing hole as a guide by poking a pointed
implement from the back of the drawer to the front.
There you have it! A truly unique chest of drawers which can
totally transform a room. Now all I have to do next is paint the wood!
I didn’t stop there, I decided to spread my love of
wallpapering to the kitchen. See below how I managed to liven up a bookcase with a
little wallpaper, pva glue and by displaying a load of my favourite items. I
still have plans to add more but I will tell you about that later as more
crafty DIY makes pop up over the next few weeks!


No comments:
Post a Comment